在同学们使用某些网站的新版本页面的时候,经常会出现一个类似于新手引导一样的效果,本文主要介绍了js页面引导页的实现思路总结,感兴趣的可以了解一下
实现思路1
采用png格式的方式,然后高亮部分镂空,其它部分采用,如下图所示,简单误差大
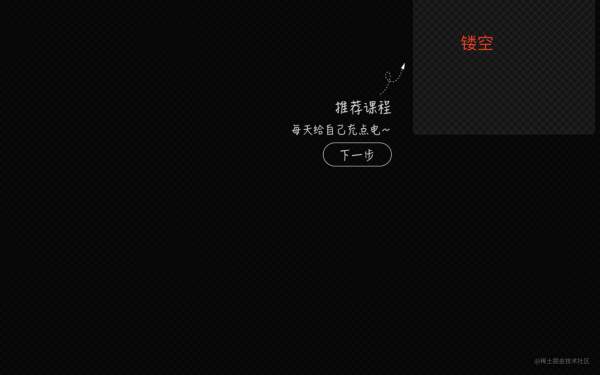
其效果如图所示,点击下一步等没法按照图片中的“下一步”按钮来操作,就算可以通过方法getBoundingClientRect来获取,也会存在很大误差。这个思路只能说是一种思路,不太推荐使用,方法简单但不够精确

实现思路2
通过组件包装,外层使用的时候传入对应的数据结构,我自己的页面如下所示,所以数据包含title/content/target/entry/leave等内容,这个可以根据实际情况配置,但是target是必须有的,它主要是需要将其高亮展示,同时在旁边挂上content内容引导。
const stepData = [{ title: '组件库和图标', content: '从基础组件、自定义业务组件、图标库中拖拽组件或图标到画布区域进行页面编排组装', target: '#editPageLeftSideBar', entry: () => void, leave: () => void }]
组件里实现下一步切换的公共逻辑,如果存在不是公共逻辑,可以将方法写在上面stepData里,在组件下一步方法里进行调用。
const clearCls = () => { document.body.querySelectorAll('.guide-highlight').forEach(el => { el.classList.remove('guide-highlight') }) } const addCls = (target) => { target.classList.add('guide-highlight'); } const getTarget = () => { const currentStep = props.stepData[state.currentStepIndex] return document.querySelector(currentStep.target) } const onGoNext = () => { // 清除所有的高亮class, 因为我是通过class样式来控制的 clearCls() // 查找下一步的目标对象 const currentStep = props.stepData[state.currentStepIndex] const $stepTarget = getTarget() // 给target添加class addCls() // 执行其它方法,譬如上面的leave/entry方法 if (typeof state.currentStep.leave === 'function') { state.currentStep.leave() } if (typeof currentStep.entry === 'function') { currentStep.entry() } // 计算引导容器的位置style const windowWidth = window.innerWidth const windowHieght = window.innerHeight const { top: targetTop, right: targetRight, bottom: targeBottom, left: targetLeft, width: targetWidth } = $stepTarget.getBoundingClientRect() const { width, height } = tipRef.value.getBoundingClientRect() let placement = 'left' if (width > height && targeBottom <0.3 * windowHieght) { placement = targeBottom > 0.5 * windowHieght ? 'top' : 'bottom' } else { placement = targetLeft > 0.5 * windowWidth ? 'left' : 'right' } let styles = {} if (placement === 'bottom') { styles = { top: `${targeBottom + 10}px`, left: `${targetLeft + (targetWidth - width) / 2}px` } } else if (placement === 'top') { styles = { top: `${windowHieght - targetTop - height - 10}px`, left: `${targetLeft + (targetWidth - width) / 2}px` } } else if (placement === 'left') { styles = { top: `${targetTop}px`, right: `${windowWidth - targetLeft + 10}px` } } else if (placement === 'right') { styles = { top: `${targetTop}px`, left: `${targetRight + 10}px` } } }插件
introjs/driver.js等第三方库
到此这篇关于js页面引导页的实现思路总结的文章就介绍到这了,更多相关js 引导页内容请搜索0133技术站以前的文章或继续浏览下面的相关文章希望大家以后多多支持0133技术站!
以上就是js页面引导页的实现思路总结的详细内容,更多请关注0133技术站其它相关文章!


