这篇文章主要带领大家学习JavaScript鼠标响应事件,为大家分享了一个简单的鼠标模拟案例,感兴趣的小伙伴们可以参考一下
本文为大家分享了一个简单的鼠标模拟案例,供大家参考,具体实现内容如下
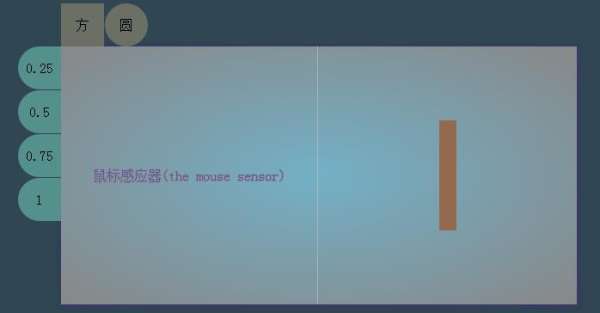
如何实现捕抓鼠标事件,当鼠标滑动时,获取当前鼠标的坐标,接着在一个透明区域里绑定捕抓的位移,这样就能在模拟的透明区域里实现鼠标滑动的模型。
效果图:
HTML代码:
the mouse 默认圆0.250.50.751鼠标感应器(the mouse sensor)
CSS代码:
* { margin: 0; padding: 0; box-sizing: border-box; } body { position: absolute; text-align: center; height: 100%; width: 100%; } .main{ position: relative; margin: 0 auto; height: 100%; background-color: rgb(48, 70, 82) } .main .content{ position:absolute; display: inline-block; top:50%; left:50%; margin-left: -300px; margin-top: -150px; width: 600px; height: 300px; line-height: 300px; /*overflow: hidden;*/ background: radial-gradient(ellipse farthest-corner, rgb(115, 176, 198) 0%, #888 100%); background: -webkit-radial-gradient(ellipse farthest-corner, rgb(115, 176, 198) 0%, #888 100%); box-shadow: 2px 3px 8px rgba(67, 50, 124 ,.6),0px 0px 8px rgba(67, 50, 124 ,.6); } .main .content .content-nav-top{ display: none; position: absolute; margin-top: -50px; height: 50px; width: 300px; } .main .content .content-nav-top >span{ display: block; float: left; font-size: 16px; font-weight: normal; margin-right:1px; width: 50px; height: 50px; line-height: 50px; background-color: rgba(251, 214, 146,.3); box-shadow: 0px 4px 13px rgb(222,222,222,1); cursor: pointer; } .main .content .content-nav-top >span:nth-child(1){ border-radius:0 ; } .main .content .content-nav-top >span:nth-child(2){ border-radius:50% ; } .main .content .content-nav-top >span:nth-child(3){ border-radius:0; } .main .content .content-nav-top >span:nth-child(4){ border-radius: 50% ; } .main .content .content-nav-left{ display: none; position: absolute; margin-left: -50px; width: 50px; height: 300px; } .main .content .content-nav-left >span{ display: block; font-size: 16px; font-weight: normal; margin-bottom:1px; width: 50px; height: 50px; line-height: 50px; background-color: rgb(85, 145, 140); box-shadow: 0px 4px 13px rgb(222,222,222,1); border-radius:50% 0 0 50% ; cursor: pointer; } .box{ position: relative; float: left; width: 49.9%; height: 100%; border-right-style: solid; border-right-width: 1px; border-right-color: rgba(211,211,211,.5); color:rgb(99, 84, 168); text-shadow: 0px 1px 0px #888,1px 0px 0px #888,0px 0px 1px #888; } .block{ float: right; width: 50%; height: 100%; }
JS代码:
var koringz = (function(){ var x, y, getmain, getcontent, getbox, getblock, getblock_case, getnav_top, block_case_margin_top, block_case_margin_left, block_casetostring1, block_casetostring2, block_casesubstring1, block_casesubstring2, istouch; getmain = document.querySelector('.main'); getcontent = getmain.querySelector('.content'); getbox = getcontent.querySelector('.box'); getblock = getcontent.querySelector('.block'); getblock_case = getblock.querySelector('.block_case'); getnav_top = getcontent.querySelector('.content-nav-top'); getnav_left = getcontent.querySelector('.content-nav-left'); function get_box() { w_getbox_distance = getbox.offsetWidth; h_getbox_distance = getbox.offsetHeight; istouch = 'ontouchstart' in window; getbox.addEventListener(istouch?'touchmove':'mousemove',mouseevent,false); getbox.addEventListener(istouch?'touchmove':'mousemove',nav,false) } function nav () { return new_nav(); } var new_nav = function () { getnav_top.style.display = 'block'; getnav_left.style.display = 'block'; } function move_box() { getblock_case.style.width = '0px'; getblock_case.style.height = '0px'; block_case_margin_left = getblock_case.style.marginLeft = getblock.offsetWidth/2 + 'px';//子节点 block_case_margin_top = getblock_case.style.marginTop = getblock.offsetHeight/2 + 'px'; block_casetostring1 = block_case_margin_left.toString();//值转化为字符串 block_casetostring2 = block_case_margin_top.toString(); block_casesubstring1 = block_casetostring1.substring(0,3); block_casesubstring2 = block_casetostring2.substring(0,3); } var mouseevent = function () { mouseEvent(event); } function mouseEvent(e){ var zore = 0, val = 1; if(istouch){ x = e.touches[zore].pageX; y = e.touches[zore].pageY; e.preventDefault(); } else if(!istouch){ x = w_getbox_distance/2 != undefined ? e.offsetX:e.layerX; y = h_getbox_distance/2 != undefined ? e.offsetY:e.layerY; } if(val = true){ getblock_case.style.width = x + 'px';//获得了mouse划过的位置 getblock_case.style.height = y + 'px'; getblock_case.style.marginLeft = (block_casesubstring1-x/2) +'px'; getblock_case.style.marginTop = (block_casesubstring2-y/2) +'px'; getblock_case.style.backgroundColor = "rgba(147, 106, 77,1)"; } } (function (){ window.onload = function(){ move_box(); get_box() } })() var click =function () { this.borderradius = function(num) { if(typeof num == 'number'){ if(num == 0){ getblock_case.style.borderRadius = num; } else if(num > 0){ getblock_case.style.borderRadius = num +'%'; } else{ return false; } } } this.opacitas = function (num) { if(typeof num == 'number'){ getblock_case.style.opacity = num; } else{ return false; } } } var Click = new click(); return { createclick1 :Click.borderradius, createclick2 :Click.opacitas } })()这里的鼠标箭头也可换成自己喜欢的图标,模拟鼠标区域的颜色也可自由变换,模拟区域的效果也可是点状的,也可以是线状的,动画效果等等,这个自由发挥吧。
以上就是针对JavaScript鼠标响应事件进行的详细介绍,希望对大家的学习有所帮助。
以上就是学习JavaScript鼠标响应事件的详细内容,更多请关注0133技术站其它相关文章!


