这篇文章主要介绍了使用CSS实现中间镂空的图片遮罩效果的方法,文中同时附带介绍了一个用CSS3实现的镂空一个圆形的代码示例,需要的朋友可以参考下
中间镂空的图片遮罩指的大概就是这样一个效果:
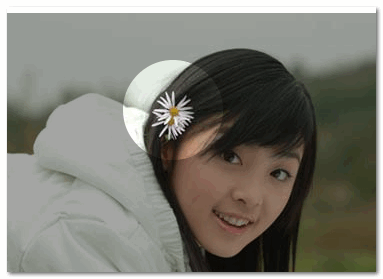
镂空一个洞的代码
CSS Code复制内容到剪贴板
- "container" style="position: relative; margin: 550px 0 0 50px;">
- "position: absolute;" width="400" height="280">
-
- "mask3">
- "0" y="0" width="100%" height="100%" style="stroke:none; fill: #ccc">
- <circle id="circle1" cx="100" cy="100" r="50" style="fill: #000" />
-
-
- "0" y="0" width="100%" height="100%" style="stroke: none; fill: #ccc; mask: url(#mask3)">
-
- src="http://img6.cache.netease.com/cnews/2014/11/3/20141103100737855b7.jpg-600" />
镂空多个洞的代码
CSS Code复制内容到剪贴板
- "container" style="position: relative;">
- "position: absolute;" width="400" height="280">
-
- "mask3">
- "0" y="0" width="100%" height="100%" style="stroke:none; fill: #ccc">
- <circle id="circle1" cx="100" cy="50" r="50" style="fill: #000" />
- <circle id="circle1" cx="300" cy="100" r="50" style="fill: #000" />
- <circle id="circle1" cx="100" cy="200" r="50" style="fill: #000" />
-
-
- "0" y="0" width="100%" height="100%" style="stroke: none; fill: #ccc; mask: url(#mask3)">
-
- src="http://img6.cache.netease.com/cnews/2014/11/3/20141103100737855b7.jpg-600" />


