这篇文章主要介绍了flutter 实现弹出窗点击下拉栏微信右上角弹出窗功能,这段代码使用的是PopupRoute这个路由类进行实现 的,分步骤通过实例代码讲解的非常详细,需要的朋友可以参考下
先看效果实现
需求分析
这个是使用 PopupRoute这个路由类进行实现
大概原理就是利用PopupRpute这个类进行改造,然后自定义一个页面,页面内镶嵌一个动画类,用来实现缩放动画
大概分为三部分,PopupRoute改造,弹出页面设置,动画类设置。
为什么选择PopupRoute?
可以镶嵌在flutter本身的路由管理之中
也就是逻辑操作都是正常的页面管理,可以手动管理,也可以用路由返回直接关掉,不会影响原有页面和布局
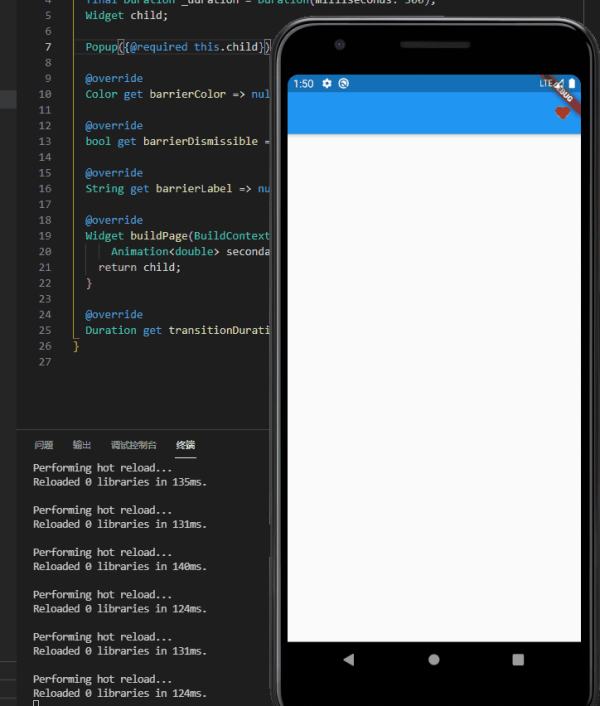
第一步,改造PopupRoute类
import 'package:flutter/material.dart'; class Popup extends PopupRoute { final Duration _duration = Duration(milliseconds: 300); Widget child; Popup({@required this.child}); @override Color get barrierColor => null; @override bool get barrierDismissible => true; @override String get barrierLabel => null; @override Widget buildPage(BuildContext context, Animation animation, Animation secondaryAnimation) { return child; } @override Duration get transitionDuration => _duration; } 第二步,新建一个弹窗页面
页面分两部分
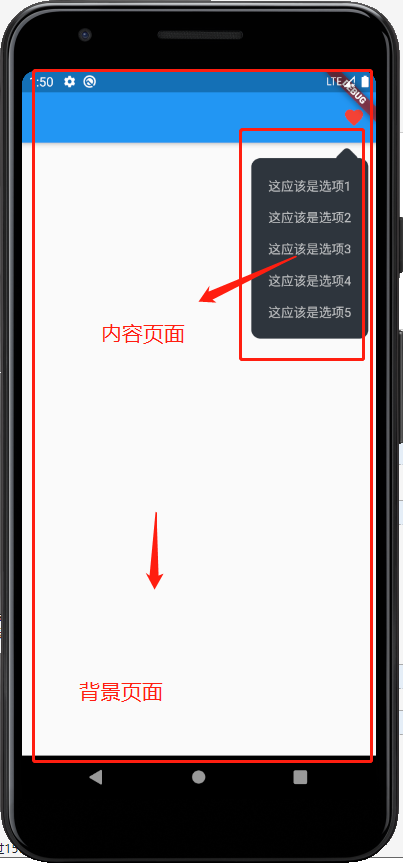
一个是页面的背景,一个是页面的内容
注意,弹窗动画的代码在下方
class Model extends StatefulWidget { final double left; //距离左边位置 弹窗的x轴定位 final double top; //距离上面位置 弹窗的y轴定位 final bool otherClose; //点击背景关闭页面 final Widget child; //传入弹窗的样式 final Function fun; // 把关闭的函数返回给父组件 参考vue的$emit final Offset offset; // 弹窗动画的起点 Model({ @required this.child, this.left = 0, this.top = 0, this.otherClose = false, this.fun, this.offset, }); @override _ModelState createState() => _ModelState(); } class _ModelState extends State { AnimationController animateController; @override Widget build(BuildContext context) { return Material( color: Colors.transparent, child: Stack( children: [ Positioned( child: GestureDetector( child: Container( width: MediaQuery.of(context).size.width, height: MediaQuery.of(context).size.height, color: Colors.transparent, ), onTap: () async { if (widget.otherClose) { } else { closeModel(); } }, ), ), Positioned( /// 这个是弹窗动画 在下方,我把他分离 防止太长 child: ZoomInOffset( duration: Duration(milliseconds: 180), offset: widget.offset, controller: (controller) { animateController = controller; widget.fun(closeModel); }, child: widget.child, ), left: widget.left, top: widget.top, ), ], ), ); } ///关闭页面动画 Future closeModel() async { await animateController.reverse(); Navigator.pop(context); } } 动画代码
我是直接复制animate_do:^2.0.0 这个版本的ZoomIn的动画类
这个插件本身就是依赖flutter 自带的动画来完成的,很简洁,使用很方便,不过默认构造的时候没有动画的启动方向,默认是最中心。但是可以添加个参数,我把源码复制出来自己改造了一下。这个类在构造的时候有个controller 参数,类型的函数,带一个AnimationController的参数把控制器通过函数传递出去到Model类,可以在Model类里面进行控制动画开启和关闭后续我在Model类里面把动画关闭和返回退出PopupRoute层封装成一个函数 传递到Model里面的fun参数里面返回出去可以在最外部进行组件通信,进而控制这些子组件
import 'package:flutter/material.dart'; class ZoomInOffset extends StatefulWidget { final Key key; final Widget child; final Duration duration; final Duration delay; ///把控制器通过函数传递出去,可以在父组件进行控制 final Function(AnimationController) controller; final bool manualTrigger; final bool animate; final double from; ///这是我自己写的 起点 final Offset offset; ZoomInOffset( {this.key, this.child, this.duration = const Duration(milliseconds: 500), this.delay = const Duration(milliseconds: 0), this.controller, this.manualTrigger = false, this.animate = true, this.offset, this.from = 1.0}) : super(key: key) { if (manualTrigger == true && controller == null) { throw FlutterError('If you want to use manualTrigger:true, \n\n' 'Then you must provide the controller property, that is a callback like:\n\n' ' ( controller: AnimationController) => yourController = controller \n\n'); } } @override _ZoomInState createState() => _ZoomInState(); } /// State class, where the magic happens class _ZoomInState extends State with SingleTickerProviderStateMixin { AnimationController controller; bool disposed = false; Animation fade; Animation opacity; @override void dispose() async { disposed = true; controller.dispose(); super.dispose(); } @override void initState() { super.initState(); controller = AnimationController(duration: widget.duration, vsync: this); fade = Tween(begin: 0.0, end: widget.from) .animate(CurvedAnimation(curve: Curves.easeOut, parent: controller)); opacity = Tween(begin: 0.0, end: 1) .animate(CurvedAnimation(parent: controller, curve: Interval(0, 0.65))); if (!widget.manualTrigger && widget.animate) { Future.delayed(widget.delay, () { if (!disposed) { controller?.forward(); } }); } if (widget.controller is Function) { widget.controller(controller); } } @override Widget build(BuildContext context) { if (widget.animate && widget.delay.inMilliseconds == 0) { controller?.forward(); } return AnimatedBuilder( animation: fade, builder: (BuildContext context, Widget child) { /// 这个transform有origin的可选构造参数,我们可以手动添加 return Transform.scale( origin: widget.offset, scale: fade.value, child: Opacity( opacity: opacity.value, child: widget.child, ), ); }, ); } } 最后页面调用
我用stack类进行堆叠组件,堆叠出上面箭头
其实可以抽成一个方向设置不过太麻烦了我没写,毕竟能用就行
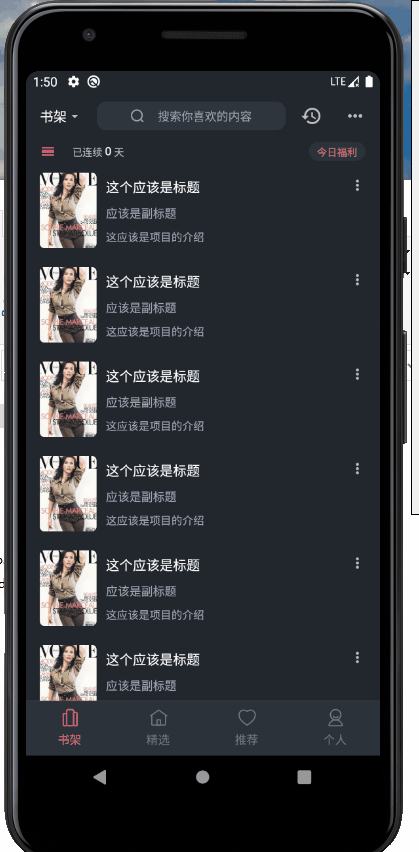
import 'package:flutter/material.dart'; import 'package:one/widget/Model.dart'; import 'package:one/widget/Popup.dart'; void main() { runApp(MyApp()); } class MyApp extends StatefulWidget { @override _MyAppState createState() => _MyAppState(); } class _MyAppState extends State { ///给获取详细信息的widget设置一个key GlobalKey iconkey = GlobalKey(); ///获取位置,给后续弹窗设置位置 Offset iconOffset; ///获取size 后续计算弹出位置 Size iconSize; ///接受弹窗类构造成功传递来的关闭参数 Function closeModel; @override Widget build(BuildContext context) { ///等待widget初始化完成 WidgetsBinding.instance.addPostFrameCallback((duration) { ///通过key获取到widget的位置 RenderBox box = iconkey.currentContext.findRenderObject(); ///获取widget的高宽 iconSize = box.size; ///获取位置 iconOffset = box.localToGlobal(Offset.zero); }); return MaterialApp( home: Builder( builder: (context) => Scaffold( appBar: AppBar( actions: [ IconButton( key: iconkey, icon: Icon( Icons.favorite, color: Colors.red, ), onPressed: () { showModel(context); }, ), ], ), body: Column( children: [], ), ), ), ); } ///播放动画 void showModel(BuildContext context) { /// 设置传入弹窗的高宽 double _width = 130; double _height = 230; Navigator.push( context, Popup( child: Model( left: iconOffset.dx - _width + iconSize.width / 1.2, top: iconOffset.dy + iconSize.height / 1.3, offset: Offset(_width / 2, -_height / 2), child: Container( width: _width, height: _height, child: buildMenu(), ), fun: (close) { closeModel = close; }, ), ), ); } ///构造传入的widget Widget buildMenu() { ///构造List List _list = [1, 2, 3, 4, 5]; return Container( height: 160, width: 230, child: Stack( children: [ Positioned( right: 4, top: 17, child: Container( width: 20, height: 20, transform: Matrix4.rotationZ(45 * 3.14 / 180), decoration: BoxDecoration( color: Color.fromRGBO(46, 53, 61, 1), borderRadius: BorderRadius.circular(5), ), ), ), ///菜单内容 Positioned( bottom: 0, child: Container( padding: EdgeInsets.only( top: 20, bottom: 20, left: 10, right: 10, ), width: 130, height: 200, decoration: BoxDecoration( borderRadius: BorderRadius.circular(10), color: Color.fromRGBO(46, 53, 61, 1), ), child: Column( mainAxisAlignment: MainAxisAlignment.spaceBetween, children: _list .map((e) => InkWell( child: Container( width: double.infinity, alignment: Alignment.center, child: Text( '这应该是选项${e.toString()}', style: TextStyle( color: Colors.white70, fontSize: 14, ), ), ), onTap: () async { print('这是点击了选项${e.toString()}'); await Future.delayed(Duration(milliseconds: 500)) .then((value) => print('开始')); await closeModel(); print('结束'); }, )) .toList(), ), ), ), ], ), ); } } 然后就能实现我们的弹窗动画了,如果想要其他效果的动画,可以手动替换动画类,或者自己手写个新的最后我自己的项目修饰效果,还有demo的代码代码 仓库地址:https://github.com/mannaoz/one
到此这篇关于flutter 实现点击下拉栏微信右上角弹出窗功能的文章就介绍到这了,更多相关flutter弹出窗内容请搜索html中文网以前的文章或继续浏览下面的相关文章希望大家以后多多支持html中文网!
以上就是flutter 实现点击下拉栏微信右上角弹出窗功能的详细内容,更多请关注0133技术站其它相关文章!


