这篇文章带你通过Androidstudio来实现微信的基础界面,微信的界面主要包含了主页、通讯录、发现以及我的账号功能区,下文包含了整个开发过程,以及解决该问题的过程及思路并提供了源码
一、内容
实操实现APP门户界面框架设计,至少包含4个tab页,能实现tab页之间的点击切换
二、技术
使用布局(layouts)和分段(fragment),对控件进行点击监听
三、xml代码
top.xml
界面居中上方写标题,背景是黑色,字体是白色

bottom.xml
界面下方分成四个模板,由图片和文字组成,正在使用的界面图标为绿色,不在使用的界面图标为黑色

fragment_config.xml/fragment_wechat/fragment_friend/fragment_contact
显示界面中间内容


activity_main.xml
将top.xml和bottom.xml放在一个界面中

四、Java代码
MainActivity.java
package com.example.cyxapp; import androidx.appcompat.app.AppCompatActivity; import android.app.Fragment; import android.app.FragmentManager; import android.app.FragmentTransaction; import android.graphics.Color; import android.os.Bundle; import android.view.View; import android.widget.LinearLayout; public class MainActivity extends AppCompatActivity implements View.OnClickListener{ private Fragment Fragment_config=new Fragment_config(); private Fragment Fragment_contact=new Fragment_contact(); private Fragment Fragment_wechat=new Fragment_wechat(); private Fragment Fragment_friend=new Fragment_friend(); private FragmentManager fragmentManager; private LinearLayout linearLayout1,linearLayout2,linearLayout3,linearLayout4; @Override protected void onCreate(Bundle savedInstanceState) { super.onCreate(savedInstanceState); setContentView(R.layout.activity_main); linearLayout1=findViewById(R.id.linearLayout1); linearLayout2=findViewById(R.id.linearLayout2); linearLayout3=findViewById(R.id.linearLayout3); linearLayout4=findViewById(R.id.linearLayout4); linearLayout1.setOnClickListener(this); linearLayout2.setOnClickListener(this); linearLayout3.setOnClickListener(this); linearLayout4.setOnClickListener(this); initFragment(); } private void initFragment(){ fragmentManager=getFragmentManager(); FragmentTransaction transaction=fragmentManager.beginTransaction(); transaction.add(R.id.id_content,Fragment_wechat); transaction.add(R.id.id_content,Fragment_contact); transaction.add(R.id.id_content,Fragment_config); transaction.add(R.id.id_content,Fragment_friend); transaction.commit(); } private void hideFragment(FragmentTransaction transaction){ transaction.hide(Fragment_wechat); transaction.hide(Fragment_contact); transaction.hide(Fragment_config); transaction.hide(Fragment_friend); } private void background(View v) { switch (v.getId()) { case R.id.linearLayout1: linearLayout1.setBackgroundColor(Color.parseColor("#426F42")); break; case R.id.linearLayout2: linearLayout2.setBackgroundColor(Color.parseColor("#426F42")); break; case R.id.linearLayout3: linearLayout3.setBackgroundColor(Color.parseColor("#426F42")); break; case R.id.linearLayout4: linearLayout4.setBackgroundColor(Color.parseColor("#426F42")); break; default: break; } } private void backgroundreturn(View v) { switch (v.getId()) { case R.id.linearLayout1: linearLayout1.setBackgroundColor(Color.parseColor("#000000")); break; case R.id.linearLayout2: linearLayout2.setBackgroundColor(Color.parseColor("#000000")); break; case R.id.linearLayout3: linearLayout3.setBackgroundColor(Color.parseColor("#000000")); break; case R.id.linearLayout4: linearLayout4.setBackgroundColor(Color.parseColor("#000000")); break; default: break; } } private void showfragmnet(int i) { FragmentTransaction transaction=fragmentManager.beginTransaction(); hideFragment(transaction); switch (i){ case 0: transaction.show(Fragment_wechat); background(linearLayout1); backgroundreturn(linearLayout3); backgroundreturn(linearLayout2); backgroundreturn(linearLayout4); break; case 1: transaction.show(Fragment_friend); background(linearLayout2); backgroundreturn(linearLayout4); backgroundreturn(linearLayout1); backgroundreturn(linearLayout3); break; case 2: transaction.show(Fragment_contact); background(linearLayout3); backgroundreturn(linearLayout4); backgroundreturn(linearLayout2); backgroundreturn(linearLayout1); break; case 3: transaction.show(Fragment_config); background(linearLayout4); backgroundreturn(linearLayout1); backgroundreturn(linearLayout2); backgroundreturn(linearLayout3); break; default: break; } transaction.commit(); } @Override public void onClick(View v) { switch (v.getId()){ case R.id.linearLayout1: showfragmnet(0); break; case R.id.linearLayout2: showfragmnet(1); break; case R.id.linearLayout3: showfragmnet(2); break; case R.id.linearLayout4: showfragmnet(3); break; default: break; } } }initFragment函数中利用transaction来实现fragment的切换
hideFragment把没有使用的界面的fragment的内容隐藏起来
background使图标点击后变绿色
backgroundreturn让图标恢复黑色
showfragmnet显示正在使用界面的fragment的内容
onClick监听函数,监听到底是哪一个图标被击中从而显示哪一个界面的内容
Fragment_config.java
package com.example.cyxapp; import android.app.Fragment; import android.os.Bundle; import android.view.LayoutInflater; import android.view.View; import android.view.ViewGroup; public class Fragment_config extends Fragment { public Fragment_config() { // Required empty public constructor } @Override public View onCreateView(LayoutInflater inflater, ViewGroup container, Bundle savedInstanceState) { // Inflate the layout for this fragment return inflater.inflate(R.layout.fragment_config, container, false); } }Fragment_contact、Fragment_friend、Fragment_wechat类似
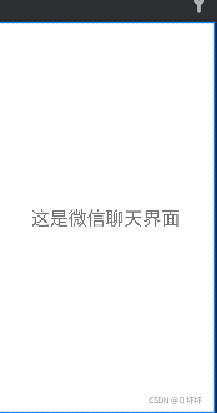
五、界面展示


代码仓库地址:cccyuxuan/cyxApp1 (github.com)
到此这篇关于AndroidStudio实现微信界面设计的文章就介绍到这了,更多相关AndroidStudio 微信 内容请搜索0133技术站以前的文章或继续浏览下面的相关文章希望大家以后多多支持0133技术站!
以上就是AndroidStudio实现微信界面设计的详细内容,更多请关注0133技术站其它相关文章!


