python如何制作缩略图?这篇文章主要为大家详细介绍了python制作缩略图的方法,具有一定的参考价值,感兴趣的小伙伴们可以参考一下
本文实例为大家分享了python制作缩略图的具体代码,供大家参考,具体内容如下
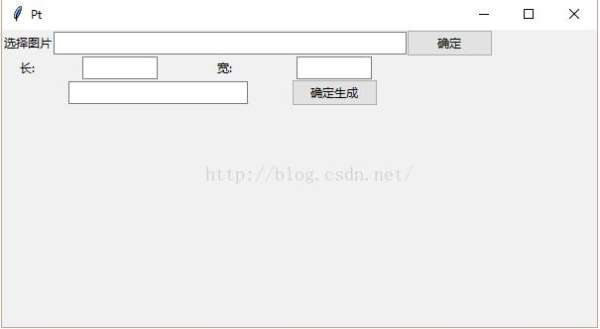
import cv2 #导入opencv模块 from tkinter import * #导入tkinter模块 from tkinter import ttk #tkinter最新的主题部件 from PIL import Image #初始化模块 root = Tk() root.title('Pt') root.geometry('600x300') #查找图片路径,成功则显示图片 def searchPicture(): location = locOfPicture.get() img = cv2.imread(location) cv2.imshow("Image",img) #生成缩略图 def setPicture(): # 获取图片路径 location = locOfPicture.get() # 对图片进行操作 im = Image.open(location) im.thumbnail((int(heightOfPicture.get()),int(widthOfPicture.get()))) im.save(nameOfImg.get(),'JPEG') label1 = ttk.Label(root,text='选择图片') label2 = ttk.Label(root,text='长:') label3 = ttk.Label(root,text='宽:') label4 = ttk.Label(root,text='文件名') #存储输入框中输入的变量 locOfPicture = StringVar() heightOfPicture= StringVar() widthOfPicture = StringVar() nameOfImg = StringVar() entry1 = ttk.Entry(root,textvariable = locOfPicture,width=50) entry2 = ttk.Entry(root,textvariable=heightOfPicture,width=10) entry3 = ttk.Entry(root,textvariable=widthOfPicture,width=10) entry4 = ttk.Entry(root,textvariable=nameOfImg,width=25) button1 = ttk.Button(root,text='确定',command=searchPicture) button2 = ttk.Button(root,text='确定生成',command=setPicture) #进行界面布局 label1.grid(column=0,row=0) entry1.grid(column=1,row=0,columnspan=3) button1.grid(column=4,row=0) label2.grid(column=0,row=1) entry2.grid(column=1,row=1) label3.grid(column=2,row=1) entry3.grid(column=3,row=1) entry4.grid(column=1,row=2,columnspan=2) button2.grid(column=3,row=2) root.mainloop()效果图:

小编再分享一段代码:
#!/usr/bin/env python #coding=utf-8 ''' Created on 2012-6-2 @author: fatkun ''' import Image import os import sys import glob import time def make_thumb(path, thumb_path, size): """生成缩略图""" img = Image.open(path) width, height = img.size # 裁剪图片成正方形 if width > height: delta = (width - height) / 2 box = (delta, 0, width - delta, height) region = img.crop(box) elif height > width: delta = (height - width) / 2 box = (0, delta, width, height - delta) region = img.crop(box) else: region = img # 缩放 thumb = region.resize((size, size), Image.ANTIALIAS) base, ext = os.path.splitext(os.path.basename(path)) filename = os.path.join(thumb_path, '%s_thumb.jpg-600' % (base,)) print filename # 保存 thumb.save(filename, quality=70) def merge_thumb(files, output_file): """合并图片""" imgs = [] width = 0 height = 0 # 计算总宽度和长度 for file in files: img = Image.open(file) if img.mode != 'RGB': img = img.convert('RGB') imgs.append(img) if img.size[0] > width: width = img.size[0] height += img.size[1] # 新建一个白色底的图片 merge_img = Image.new('RGB', (width, height), 0xffffff) cur_height = 0 for img in imgs: # 把图片粘贴上去 merge_img.paste(img, (0, cur_height)) cur_height += img.size[1] merge_img.save(output_file, quality=70) if __name__ == '__main__': ROOT_PATH = os.path.abspath(os.path.dirname(__file__)) IMG_PATH = os.path.join(ROOT_PATH, 'img') THUMB_PATH = os.path.join(IMG_PATH, 'thumbs') if not os.path.exists(THUMB_PATH): os.makedirs(THUMB_PATH) # 生成缩略图 files = glob.glob(os.path.join(IMG_PATH, '*.jpg-600')) begin_time = time.clock() for file in files: make_thumb(file, THUMB_PATH, 90) end_time = time.clock() print ('make_thumb time:%s' % str(end_time - begin_time)) # 合并图片 files = glob.glob(os.path.join(THUMB_PATH, '*_thumb.jpg-600')) merge_output = os.path.join(THUMB_PATH, 'thumbs.jpg-600') begin_time = time.clock() merge_thumb(files, merge_output) end_time = time.clock() print ('merge_thumb time:%s' % str(end_time - begin_time))以上就是本文的全部内容,希望对大家的学习有所帮助,也希望大家多多支持html中文网。
以上就是python如何制作缩略图的详细内容,更多请关注0133技术站其它相关文章!


