这篇文章主要介绍了vscode配置C++环境的教程图文详解,本文通过图文并茂的形式给大家介绍的非常详细,对大家的学习或工作具有一定的参考借鉴价值,需要的朋友可以参考下
昨天从下午一直研究到晚上十一点,查阅了很多博客资料,还是没配置好vscode的C++编译环境,今天早上又弄了一下,现在OK了。虽然很多东西的原理不懂,但是现在知道这样就行了,以后用多了应该会慢慢熟悉。第一步,先去官网下载vscode。安装在自己想要的位置即可。vscode官网传送门第二步,去官网下载MinGW。安装在自己想要的位置即可。MinGW官网传送门
进入网站后不要点击 "Download Lasted Version",往下滑,找到最新版的 "x86_64-posix-seh"下载。
第三步,配置MinGW环境变量。
1.复制MinGW路径。
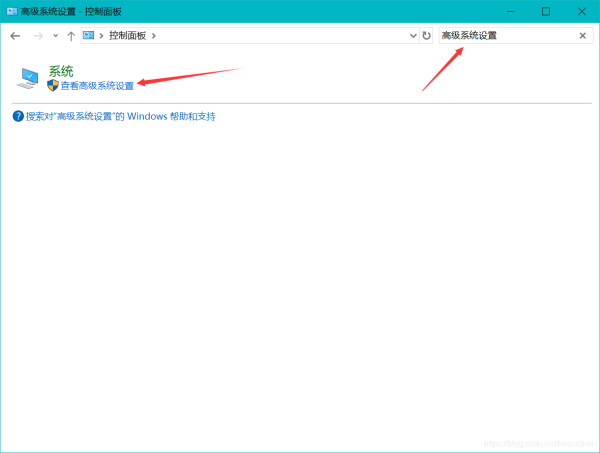
2.打开控制面板、搜索高级系统设置并进入。
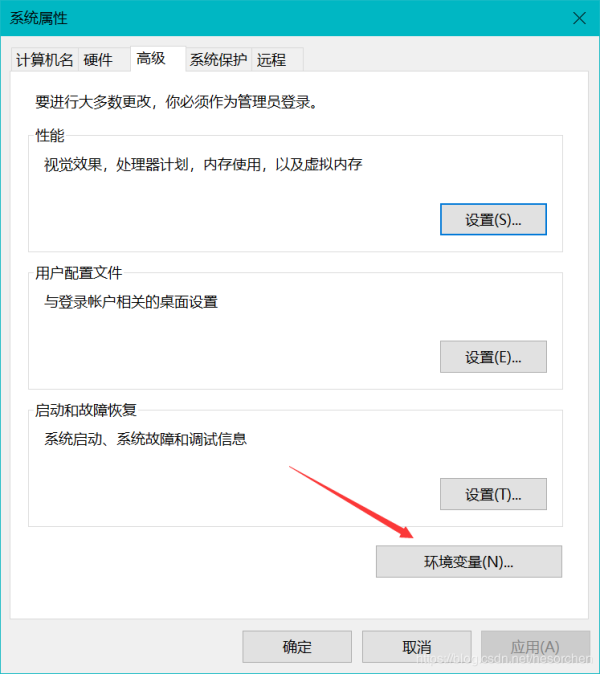
3.点击环境变量。
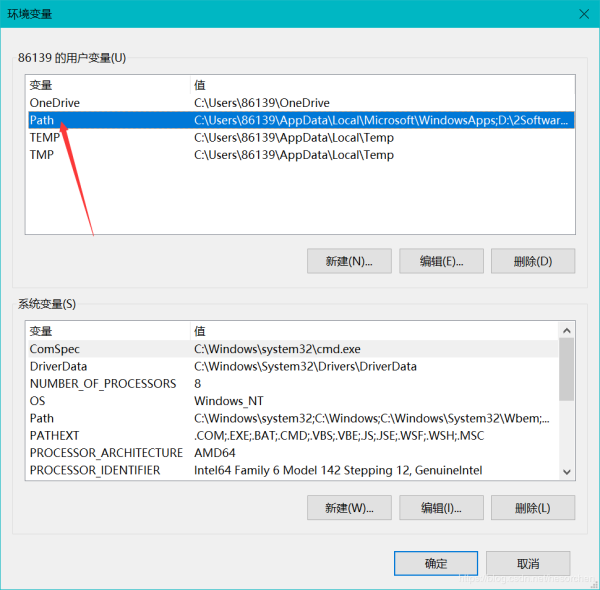
4.双击Path。
5.点击新建。
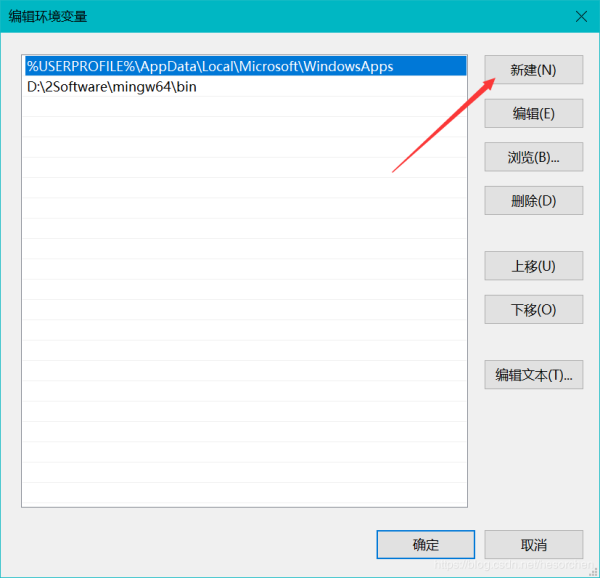
6.粘贴MinGW地址。
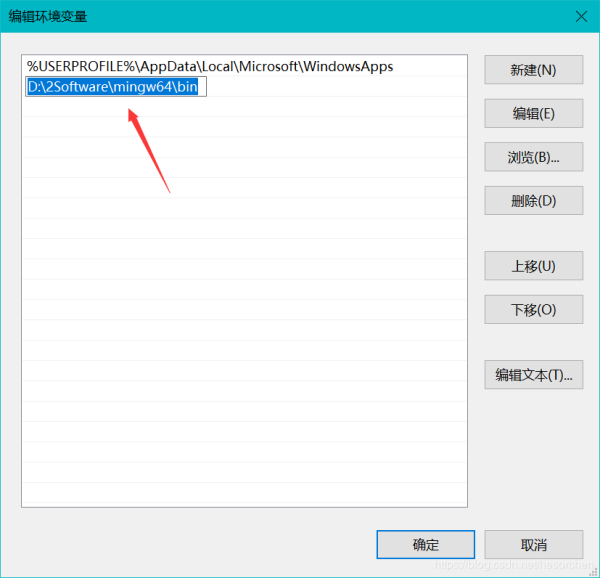
7.将刚才打开的而所有窗口按确定逐个退出。到现在MinGW环境就算是配置好了,接下来可以验证一下是否配置成功:(如果失败的话确保步骤都正确,再试一次)
按下win+r,出现运行窗口,输入cmd

输入g++,回车,会有两种反馈
第一种:环境配置成功
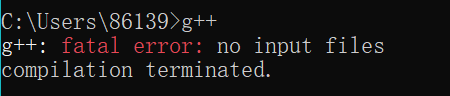
第二种:环境配置失败
提示:'g++' 不是内部或外部命令,也不是可运行的程序或批处理文件。
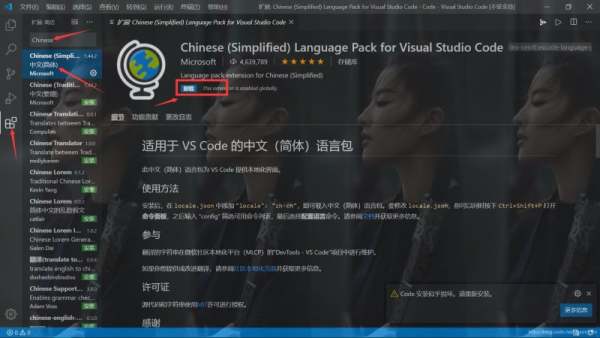
第四步,打开vscode,点击扩展,先下载一个中文包。
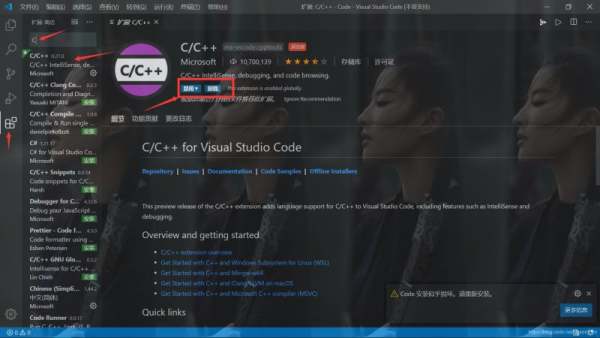
继续在扩展里边搜索C/C++插件并下载
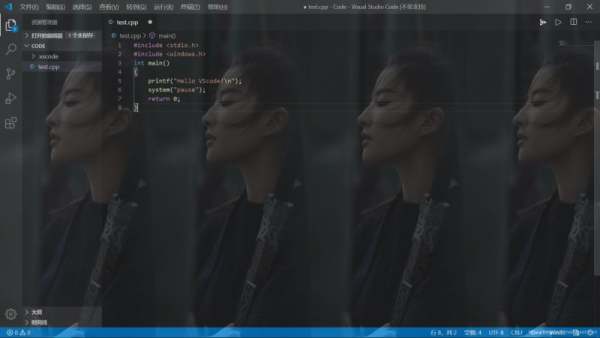
第六步,在你想要的位置新建一个code_test文件夹。然后打开vscode,打开这个文件夹

在code_test文件夹中新建一个test.cpp文件

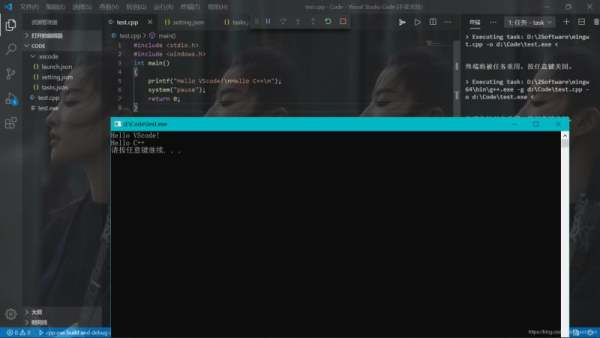
在test.cpp文件中输入一份简易的测试代码:
#include#include int main() { printf("Hello VScode!\nHello C++\n"); system("pause"); return 0; }
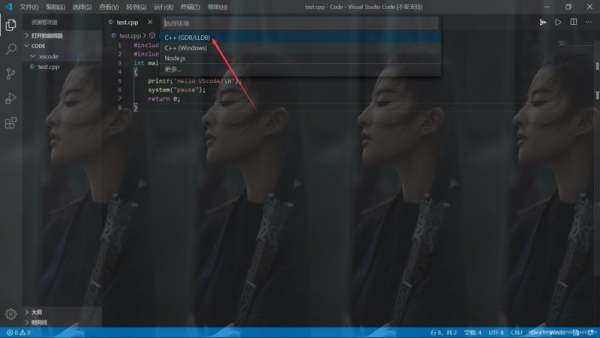
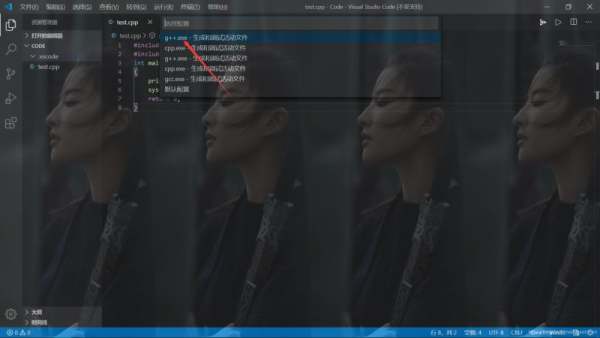
按下ctrl+F5,选择C++(GDB/LLDB),再选择g++.exe。
完成上述操作后,会出现launch.json文件,粘贴上下面的代码:(除了"miDebuggerPath"需要改成MinGW的路径,其他应该可以不用改)
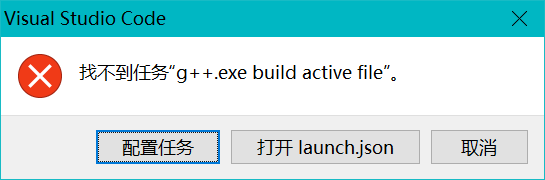
{ // 使用 IntelliSense 了解相关属性。 // 悬停以查看现有属性的描述。 // 欲了解更多信息,请访问: https://go.microsoft.com/fwlink/?linkid=830387 "version": "0.2.0", "configurations": [ { "name": "cpp.exe build and debug active file", "type": "cppdbg", "request": "launch", "program": "${fileDirname}\\${fileBasenameNoExtension}.exe", "args": [], "stopAtEntry": false, "cwd": "${workspaceFolder}", "environment": [], "externalConsole": true, "MIMode": "gdb", "miDebuggerPath": "D:\\2Software\\mingw64\\bin\\gdb.exe", //与mingw64的路径相对应! "setupCommands": [ { "description": "为 gdb 启用整齐打印", "text": "-enable-pretty-printing", "ignoreFailures": true } ], "preLaunchTask": "task g++" //修改此项 } ] }回到test.cpp文件,按下ctrl+F5,应该会出现下图,点击配置任务,
自动生成tasks.json文件,粘贴下面代码:
{ "version": "2.0.0", "tasks": [ { "type": "shell", "label": "C/C++: cpp.exe build active file", "command": "D:\\2Software\\mingw64\\bin\\cpp.exe", //对应MinGW路径 "args": [ "-g", "${file}", "-o", "${fileDirname}\\${fileBasenameNoExtension}.exe" ], "options": { "cwd": "D:\\2Software\\mingw64\\bin" //对应MinGW路径 }, "problemMatcher": [ "$gcc" ], "group": "build" } ] }接下来,在code_test文件夹底下应该会有 一个.vscode文件夹,其中已经包含了launch.json文件和tasks.json文件,我们在.vscode中创建一个setting.json文件,并粘贴上下面的代码:
{ "files.associations": { "iostream": "cpp", "cmath": "cpp", "ostream": "cpp", "cstring": "cpp", "queue": "cpp", "chrono": "cpp", "random": "cpp", "limits": "cpp", "valarray": "cpp", "*.tcc": "cpp", "iosfwd": "cpp", "bitset": "cpp", "complex": "cpp", "cstddef": "cpp", "iomanip": "cpp", "istream": "cpp", "algorithm": "cpp", "map": "cpp", "array": "cpp", "atomic": "cpp", "cctype": "cpp", "cfenv": "cpp", "charconv": "cpp", "cinttypes": "cpp", "clocale": "cpp", "codecvt": "cpp", "condition_variable": "cpp", "csetjmp": "cpp", "csignal": "cpp", "cstdarg": "cpp", "cstdint": "cpp", "cstdio": "cpp", "cstdlib": "cpp", "ctime": "cpp", "cuchar": "cpp", "cwchar": "cpp", "cwctype": "cpp", "deque": "cpp", "forward_list": "cpp", "list": "cpp", "unordered_map": "cpp", "unordered_set": "cpp", "vector": "cpp", "exception": "cpp", "functional": "cpp", "iterator": "cpp", "memory": "cpp", "memory_resource": "cpp", "numeric": "cpp", "optional": "cpp", "ratio": "cpp", "regex": "cpp", "set": "cpp", "string": "cpp", "string_view": "cpp", "system_error": "cpp", "tuple": "cpp", "type_traits": "cpp", "utility": "cpp", "fstream": "cpp", "future": "cpp", "initializer_list": "cpp", "mutex": "cpp", "new": "cpp", "scoped_allocator": "cpp", "shared_mutex": "cpp", "sstream": "cpp", "stdexcept": "cpp", "streambuf": "cpp", "thread": "cpp", "typeindex": "cpp", "typeinfo": "cpp" } }这时,我们返回到test.cpp文件,按下ctrl+F5,应该就可以正常编译运行了。
总结
到此这篇关于vscode配置C++环境的图文教程的文章就介绍到这了,更多相关vscode配置C++环境内容请搜索html中文网以前的文章或继续浏览下面的相关文章希望大家以后多多支持html中文网!
以上就是vscode配置C++环境的图文教程的详细内容,更多请关注0133技术站其它相关文章!


