这篇文章主要为大家介绍了从零构建可视化jar包部署平台JarManage教程详解,有需要的朋友可以借鉴参考下,希望能够有所帮助,祝大家多多进步,早日升职加薪
项目背景
在java项目部署过程中,由于内外部各种因素,可能会遇到一些感觉操作不便捷的场景,例如
- jar包未随系统自动启动需要每次手动重启
- 系统vpn堡垒机多重防御更新繁琐
- 系统无图形化界面命令行操作复杂
- 等等......
在工作中之前也总结了windows的Jar包部署工具与linux下的jar包自动化部署脚本,这次就想着否能将二者统一结合,本着简单/高效/功能专一的原则,做出一
个可视化jar包部署平台,JarManage应运而生
功能介绍
项目地址:https://gitee.com/code2roc/jar-manage
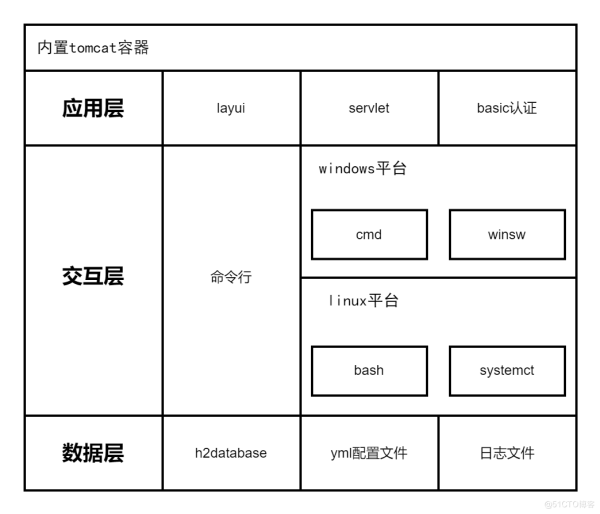
支持在线创建项目,上传Jar包,自动备份,配置启动参数,注册系统服务,查看启动日志等功能,具有以下优点
- 基于servlet开发,依赖简洁,部署包10MB左右
- 结合嵌入式tomcat一键部署,无外部容器依赖
- 使用h2db存储数据,无外部数据库依赖
- 适配windows/linux平台,满足多种环境
- 具体项目经平台部署后自动注册系统服务,无需担心服务器重启
系统架构图如下
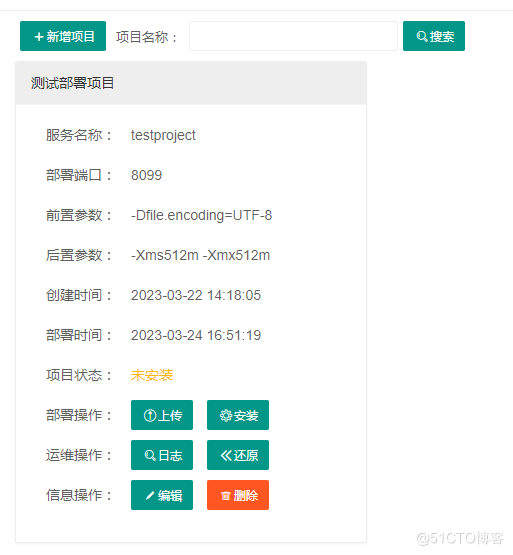
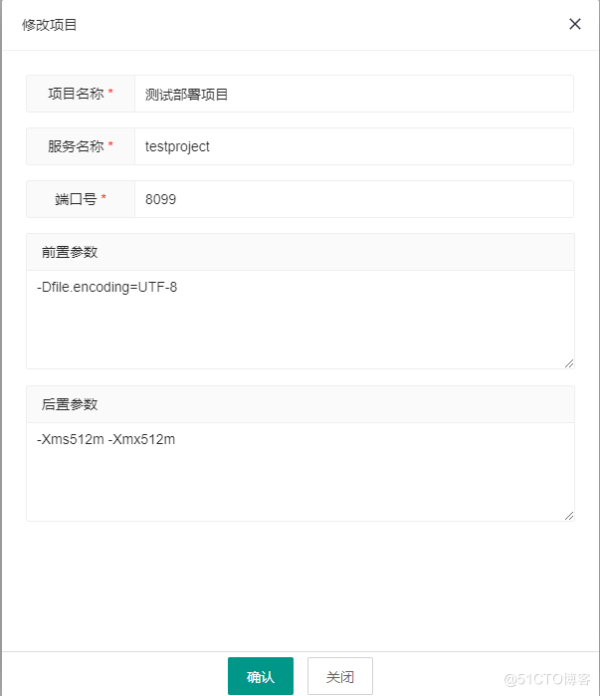
系统截图展示
技术分析
平台识别
首先通过系统os识别是windows平台还是linux平台
String os = System.getProperty("os.name").toLowerCase(); if (os.startsWith("win")) { platform = DepolyPlatform.Windows; }通过system-release文件识别部分基于CentOS开发的Linux系统
String command = "cat /etc/system-release"; String result = CMDUtil.executeLinuxCommand(command); if (result.startsWith("Red Hat")) { platform = DepolyPlatform.LinuxRedHat; } else if (result.startsWith("CentOS")) { platform = DepolyPlatform.LinuxCentOS; } else if (result.startsWith("openEuler")) { platform = DepolyPlatform.LinuxOpenEuler; }通过issue文件识别部分基于Ubuntu/Debian开发的Linux系统
command = "cat /etc/issue"; result = CMDUtil.executeLinuxCommand(command); if (!StringUtil.isEmpty(result)) { if (result.startsWith("Ubuntu")) { platform = DepolyPlatform.LinuxUbuntu; } else if (result.startsWith("Debian")) { platform = DepolyPlatform.LinuxDebian; } }windows注册服务
通过sc query命令判断服务状态
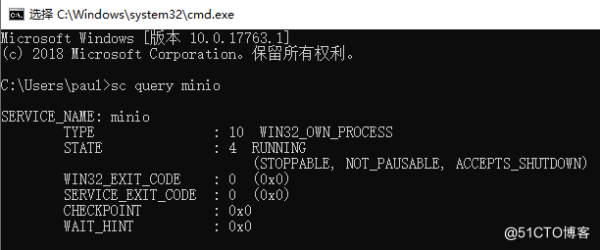
public String getStatus(String serviceName) { String status = DepolyStatus.UnInstall; try { String command = "sc query " + serviceName; String commandResultFilePath = CMDUtil.executeWindowCommandStoreFile(command); BufferedReader reader = new BufferedReader(new InputStreamReader(new FileInputStream(commandResultFilePath))); String line = reader.readLine(); while (line != null) { if (line.trim().startsWith("STATE")) { if (line.trim().substring(line.trim().indexOf(":") + 1, line.trim().indexOf(":") + 4).trim().equals("1")) status = DepolyStatus.Stopped; else if (line.trim().substring(line.trim().indexOf(":") + 1, line.trim().indexOf(":") + 4).trim().equals("2")) status = DepolyStatus.Startting; else if (line.trim().substring(line.trim().indexOf(":") + 1, line.trim().indexOf(":") + 4).trim().equals("3")) status = DepolyStatus.Stopping; else if (line.trim().substring(line.trim().indexOf(":") + 1, line.trim().indexOf(":") + 4).trim().equals("4")) status = DepolyStatus.Running; } line = reader.readLine(); } } catch (IOException e) { LogUtil.error(e); } return status; }通过winsw这个开源项目配置exe和xml文件将jar包注册为windows服务,项目地址:https://github.com/winsw/winsw/
linux注册服务
通过systemctl status命令判断服务状态
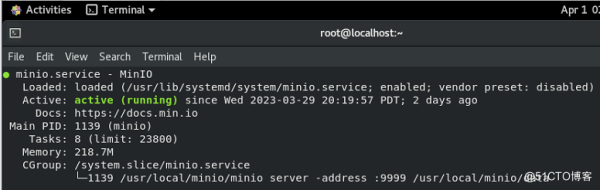
public String getStatus(String serviceName) { String status = DepolyStatus.UnInstall; try { String command = "systemctl status " + serviceName; String commandResultFilePath = CMDUtil.executeLinuxCommandWithStore(command); BufferedReader reader = new BufferedReader(new InputStreamReader(new FileInputStream(commandResultFilePath))); String line = reader.readLine(); while (line != null) { if (line.trim().startsWith("Active")) { if (line.trim().indexOf("inactive (dead)") > 0) status = DepolyStatus.Stopped; else if (line.trim().indexOf("active (running)") > 0) status = DepolyStatus.Running; else if (line.trim().indexOf("failed") > 0) status = DepolyStatus.Stopped; } line = reader.readLine(); } } catch (IOException e) { LogUtil.error(e); } return status; }通过拷贝service文件到systemd/system目录下注册linux服务
yml配置文件识别
- maven配置
org.yaml snakeyaml 1.26
- 配置文件
jarmanage: port: 8555 username: admin password: abcd@1234 backupcount: 5
- 工具类
public static String getConfigValue(String configName){ String configValue = ""; try{ Yaml yaml = new Yaml(); InputStream resourceAsStream = new FileInputStream(new File("resources"+File.separator+"application.yml")); Map obj = yaml.load(resourceAsStream); Map param = (Map) obj.get("jarmanage"); configValue = ConvertUtil.convert2String(param.get(configName)); }catch (Exception e){ LogUtil.error(e); } return configValue; } h2database使用
- maven引用
com.h2database h2 2.1.214
- 工具类
public static Connection getConnection() throws Exception { File file = new File("database"); Connection conn = DriverManager.getConnection("jdbc:h2:file:" + file.getAbsolutePath() + File.separator + "manage", "root", "abcd@1234"); return conn; } public static void executeSQL(String sql) { try { Connection conn = getConnection(); Statement stmt = conn.createStatement(); stmt.execute(sql); stmt.close(); conn.close(); } catch (Exception e) { LogUtil.error(e); } }servelt内置tomcat打包
- maven引用
org.apache.tomcat.embed tomcat-embed-core 9.0.35 org.apache.tomcat.embed tomcat-embed-el 9.0.35 org.apache.tomcat.embed tomcat-embed-jasper 9.0.35
- 手动启动
//启动tomcat服务 // 1.创建一个内嵌的Tomcat Tomcat tomcat = new Tomcat(); // 2.设置Tomcat端口 tomcat.setPort(8555); // 3.设置工作目录,tomcat需要使用这个目录进行写一些东西 final String baseDir = "workspace" + File.separator; tomcat.setBaseDir(baseDir); tomcat.getHost().setAutoDeploy(false); // 4. 设置webapp资源路径 String webappDirLocation = "webapp" + File.separator; StandardContext ctx = (StandardContext) tomcat.addWebapp("/", new File(webappDirLocation).getAbsolutePath()); // 5. 设置上下文路每径 String contextPath = ""; ctx.setPath(contextPath); ctx.addLifecycleListener(new Tomcat.FixContextListener()); ctx.setName("jar-manage"); tomcat.getHost().addChild(ctx); //6.启动 tomcat.getConnector(); tomcat.start(); tomcat.getServer().await();- 打包包含引用类库,自定义配置xml,指定运行class
maven-assembly-plugin package.xml com.code2roc.jarmanage.Application make-assembly package single org.apache.maven.plugins maven-compiler-plugin 8 8
depoly jar false / true true runtime src/main/webapp/ /webapp **/**
以上就是从零构建可视化jar包部署平台JarManage的详细内容,更多关于从零构建可视化jar包部署平台JarManage的资料请关注0133技术站其它相关文章!
以上就是从零构建可视化jar包部署平台JarManage教程的详细内容,更多请关注0133技术站其它相关文章!


