这篇文章主要介绍了SpringBoot整合Mongodb实现简单的增删查改,MongoDB是一个以分布式数据库为核心的数据库,因此高可用性、横向扩展和地理分布是内置的,并且易于使用。况且,MongoDB是免费的,开源的,感兴趣的朋友跟随小编一起看看吧
一、什么是MongoDB
MongoDB与我们之前熟知的关系型数据库(MySQL、Oracle)不同,MongoDB是一个文档数据库,它具有所需的可伸缩性和灵活性,以及所需的查询和索引。
MongoDB将数据存储在灵活的、类似JSON的文档中,这意味着文档的字段可能因文档而异,数据结构也会随着时间的推移而改变。文档模型映射到应用程序代码中的对象,使数据易于处理。MongoDB是一个以分布式数据库为核心的数据库,因此高可用性、横向扩展和地理分布是内置的,并且易于使用。况且,MongoDB是免费的,开源的。
二、在Window10上安装MongoDB

下载MSI版本(安装版)

下载的时候选择Custom

安装的时候,注意不要勾上安装可视化插件,否则安装会非常慢(除非你网速够快)

三、配置MongoDB服务
配置环境变量
复制当前路径

我的电脑->右键->高级系统设置->环境变量->系统变量
在系统变量找到Path,编辑,将上面复制的路径增加进去

四、启动服务
win+R->输入services.msc


服务启动后,在浏览器输入 127.0.0.1:2701
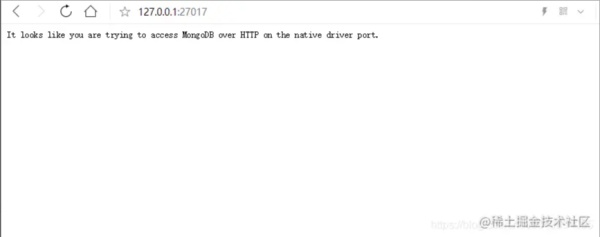
出现这行英语则代表服务启动成功。
五、SpringBoot整合MongoDB
环境准备
操作系统:Window10
IDE:IntelliJ IDEA 2018.2.4
数据库:MongoDB
1)引入依赖
org.springframework.boot spring-boot-starter-data-mongodb
2)在application.yml添加如下配置
spring: data: mongodb: uri: mongodb://localhost/test_mongodb
完整的配置信息如下:
spring: data: mongodb: authentication-database: # Authentication database name. database: # Database name. field-naming-strategy: # Fully qualified name of the FieldNamingStrategy to use. grid-fs-database: # GridFS database name. host: # Mongo server host. Cannot be set with URI. password: # Login password of the mongo server. Cannot be set with URI. port: # Mongo server port. Cannot be set with URI. repositories: type: # Type of Mongo repositories to enable. uri: # Mongo database URI. Cannot be set with host, port and credentials. username: # Login user of the mongo server. Cannot be set with URI.
3)新增实体类UserEntity
public class UserEntity { @Id private String uid; private String username; private String password; public String getUid() { return uid; } public void setUid(String uid) { this.uid = uid; } public String getUsername() { return username; } public void setUsername(String username) { this.username = username; } public String getPassword() { return password; } public void setPassword(String password) { this.password = password; } @Override public String toString() { return "UserEntity{" + "uid='" + uid + '\'' + ", username='" + username + '\'' + ", password='" + password + '\'' + '}'; } }4)新建测试。这里我用navicat作为MongoDB的可视化工具进行查看。
测试一:插入操作
@Autowired private MongoTemplate mongoTemplate; @Test public void saveUser(){ UserEntity userEntity1 = new UserEntity(); UserEntity userEntity2 = new UserEntity(); UserEntity userEntity3 = new UserEntity(); userEntity1.setUid("111"); userEntity1.setUsername("用户1"); userEntity1.setPassword("密码1"); userEntity2.setUid("222"); userEntity2.setUsername("用户2"); userEntity2.setPassword("密码2"); userEntity3.setUid("333"); userEntity3.setUsername("用户3"); userEntity3.setPassword("密码3"); mongoTemplate.save(userEntity1); mongoTemplate.save(userEntity2); mongoTemplate.save(userEntity3); }数据库信息:

可以看到,MongoDB自动创建了数据库以及通过实体类生成了集合(也就是我们经常说的数据表),而且我们已经通过MongoTemplate往数据库的userEntity集合插入了几条文档(也就是插入了几条记录)。而 _id 为主键,_class 则为实体类包名+类名
测试二:查询操作
@Autowired private MongoTemplate mongoTemplate; @Test public void findUserByUserName(){ String username = "用户1"; Query query=new Query(Criteria.where("username").is(username)); UserEntity user = mongoTemplate.findOne(query , UserEntity.class); System.out.println(user); }输出结果:
UserEntity{uid='111', username='用户1', password='密码1'}
测试三:更新操作
@Autowired private MongoTemplate mongoTemplate; @Test public void updateUser(){ UserEntity userEntity = new UserEntity(); userEntity.setUid("111"); userEntity.setUsername("更新后的用户名"); userEntity.setPassword("更新后的密码"); Query query = new Query(Criteria.where("_id").is(userEntity.getUid())); Update update = Update.update("username",userEntity.getUsername()).set("password",userEntity.getPassword()); //更新返回结果集的第一条 mongoTemplate.updateFirst(query,update,UserEntity.class); //更新返回结果集的所有 //mongoTemplate.updateMulti(query,update,UserEntity.class); }更新后数据库如图所示:

测试四:删除操作
@Autowired private MongoTemplate mongoTemplate; @Test public void DeleteByUserId(){ String id = "222"; Query query=new Query(Criteria.where("_id").is(id)); mongoTemplate.remove(query,UserEntity.class); }删除后数据库如图所示:

到此这篇关于SpringBoot整合Mongodb实现简单的增删查改的文章就介绍到这了,更多相关SpringBoot整合Mongodb增删查改内容请搜索0133技术站以前的文章或继续浏览下面的相关文章希望大家以后多多支持0133技术站!
以上就是SpringBoot整合Mongodb实现增删查改的方法的详细内容,更多请关注0133技术站其它相关文章!


